The following text is from Dumbarton Oaks Papers, Volume 14 (1960) pages 205-222. It was written by Paul Underwood. I have used most of the original black and white illustrations and added color ones from my collection:
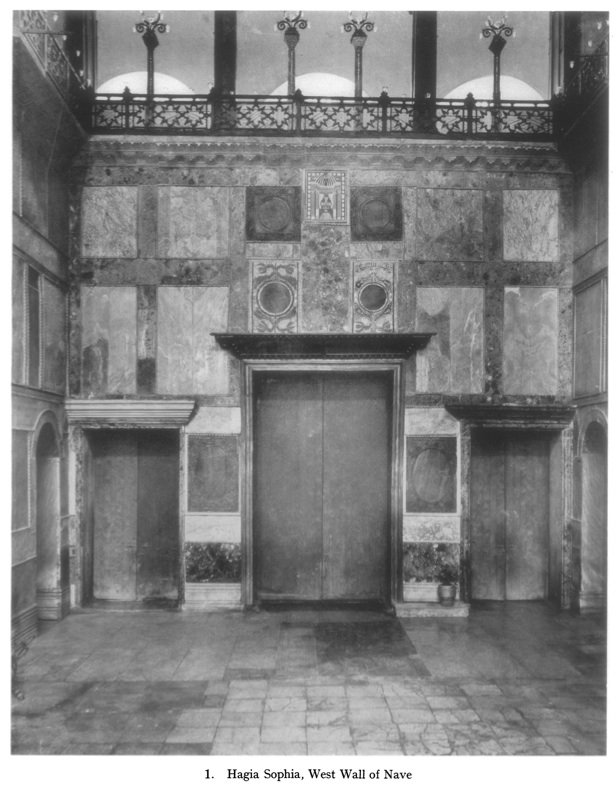
 During the season of 1958 members of the staff of the Byzantine Institute cleaned and repaired the marble revetments and the cornice of the western wall of the nave, above and between the group of three central doors that lead to the narthex (fig. I). The scope of the work included a group of five opus sectile panels above the imperial door and two at either side which together serve to enrich the wall which is otherwise covered with marble slabs, arranged in framed panels, like those that adorn the walls throughout the nave. The following notes describe the opus sectile panels and their restoration.
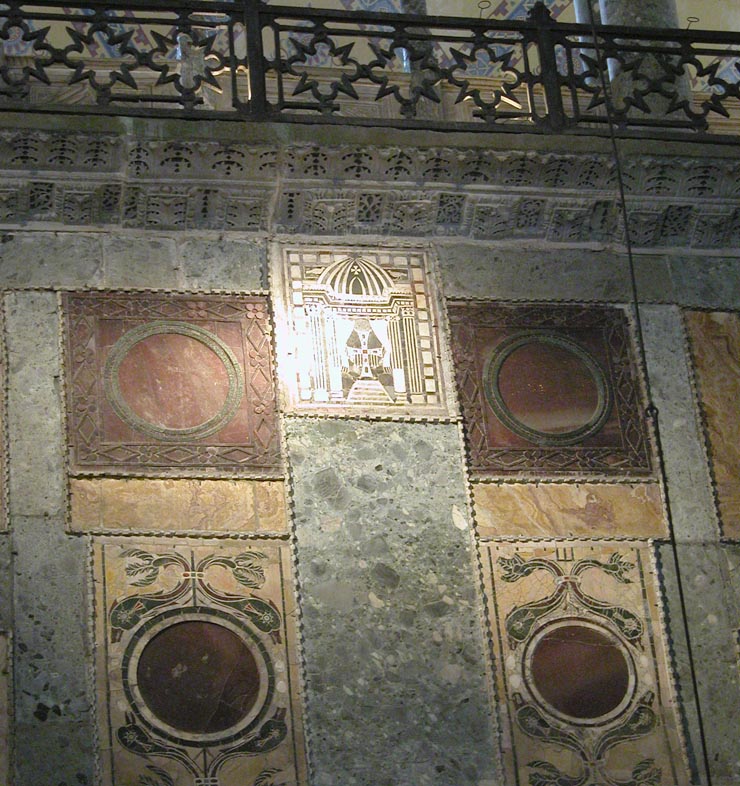 In the center at the top, immediately below the cornice, is a panel which represents an aedicula surmounted by a dome-like canopy. Like most of the marble slabs that compose the revetments of the church, this panel was framed by a projecting double billet moulding of Proconnesian marble. Within this is the outer border made up of short lengths of a red stone which are from 2 to 2.5cm in width and about 6cm in depth. This red border is set with its narrow edge flush with the surface of the panel, and because of its great depth, which nearly equals the total thickness of the panel, it forms the outer frame of the panel itself. All other pieces of surface stone that make up the design within this outer frame are very thin (between 3.5 and 6 mm. in thickness) and are set into a very hard adhesive bedding, about 4 cm. thick and of a brown color, which is made of a compound of a resin, or pitch, and what we believe to be marble dust. This bedding is backed by pieces of slate which bring the total thickness of the panel to between 6 and 7 cm.
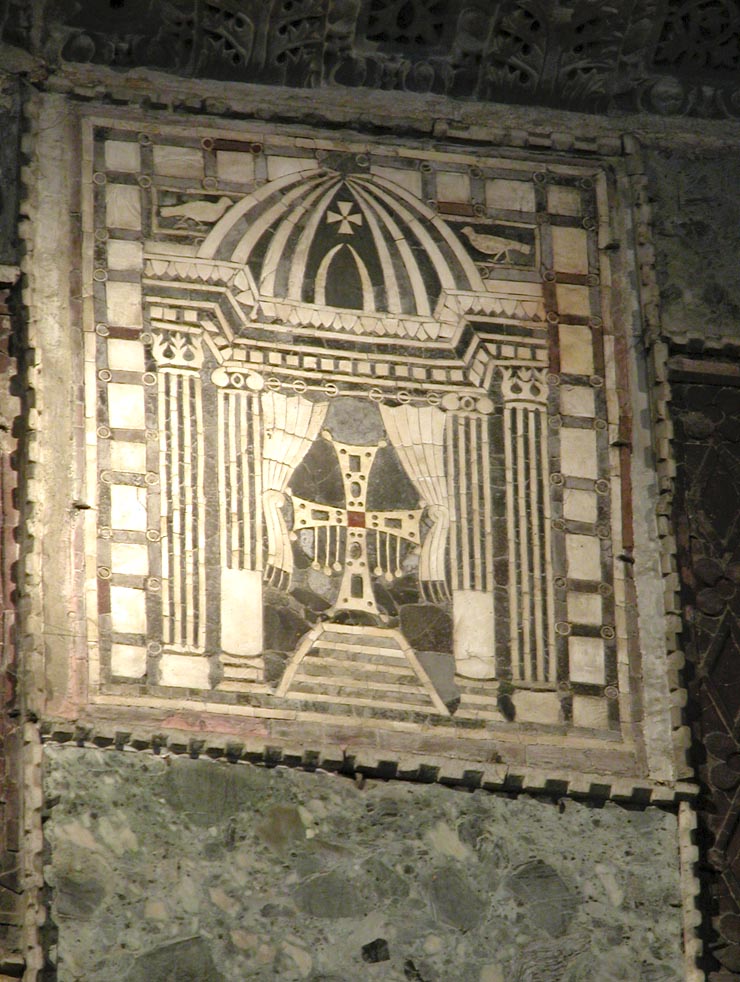 Within the outer frame, and of equal width, is a surrounding border composed of short lengths (12 cm. or less) of the nearly white stone, in appearance like a dolomite rock, which is used throughout the panel for the delineation of all its elements. A multiple border, between 12.5 and 13 cm. wide, which extends up the sides and across the top, is composed of white stone rectangles bordered by narrow bands of porphyry, about 3 cm. wide. Within the porphyry bands, at each of the corners of the white rectangles, are small porphyry discs set into narrow circlets of white stone. At the top center this multiple border is penetrated by the apex of the canopy of the aedicula. Within the confines of the multiple border everything, except the gems on the crosses, is executed in the white stone and an almost-black marble which generally serves as the background or the shad- owed parts of the architecture. The aedicula is drawn with a broken cornice in one point perspective so that the back columns appear within the span of the front columns. The front pair of columns bears Corinthian capitals which are supported on fluted shafts. The shafts of the Ionic columns at the rear are fluted only in the upper two thirds. The columns carry an entablature en-ressaut which is composed of three principal members. The lower member resembles a dentil course; the upper, a cyma decorated with the egg and dart motif; and between these is a rather wide member of black marble bordered above and below by white.
 The canopy is indicated as a kind of ribbed dome by means of eight strips of white stone that curve upward to converge at the top, and by two shorter curved strips in the center.
Above the latter is a small equal-armed cross whose arms are formed of isosceles triangles. Within narrow borders at the sides of the canopy stand two birds which face inward toward one another.
Below the cornice two parted curtains, each supported by three rings on a curtain rod, hang suspended between the two Ionic columns at the back. The curtains are knotted in the center and are fringed at the bottom. In the space between the curtains is a large jewelled cross which stands on a trapezoidal base composed of four horizontal bands of dark gray marble separated from one another by narrower bands of white stone. The sides of the base are also outlined in white stone. The cross has flaring arms with serifs at the corners in the form of teardrops. At the center was a large square gem. Each of the two vertical arms had one rectangular and one ovoid gem as well as six small circular ones, while the lateral arms had single rectangular gems surrounded by four small circular ones. Suspended from the two side arms were six pearls.
Figure 2 shows the condition of the panel prior to its restoration. In the course of its cleaning and repair it became evident that efforts had been made to disguise the existence of the crosses and the two birds. Thus, only the lower arm of the large cross was not removed and it lacked the upper of its two large gems and all but one of its small circular gems. Of the black marbles of the background immediately surrounding the cross, however, only the stones of the upper right quadrant and those across the top had been lost. All of the teardrop serifs except the two belonging to the upper arm were still in situ and are original. The lost areas of the background surrounding the cross had been filled with plaster which was painted black. On removing this plaster, and after cleaning the area of the cross, the original imprints of the stones in their setting became clearly visible, and it was on the basis of these imprints that the cross was restored. The evidence for the colors of the gems derives from the fact that the lower rectangular gem of the lower arm was still in situ and was of green porphyry. One of the circular gems was also extant and consisted of a chip of red stone. It is not certain whether the central square at the crossing of the arms had originally been white or colored, but it has been restored as red on the basis of a parallel with a cross found in work of similar technique in an ornamental panel in the west wall of the south side aisle. The evidence for the suspended gems, six in all, was also found because the black marble surrounding them was intact and the empty spaces where they belonged were clearly present. These have been filled with white plaster. In the canopy over the aedicula the four central white ribs and most of the black background between them, including the small cross, are our restorations. Most of the stones in this area had been removed, the area plastered, and the ribs incorrectly painted on the plaster. The plaster here was likewise removed and the evidence of the original details, including the small cross, came to light in the pitch setting bed. Of the two birds whose imprints were found at the sides of the dome, the one at the left is entirely our restoration except for the feet and legs which are original. Of the right-hand bird only the two pieces at the end of the tail are original.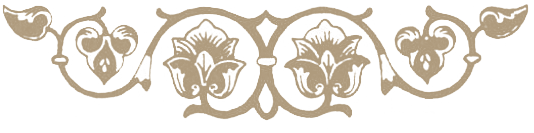 The panel representing the aedicula was made with a flush surface. In contrast, the two adjoining panels of porphyry, also of opus sectile set in a bedding of pitch, were made with borders that stand out in relief. They are placed about 50 cm. lower on the wall so as to permit the verd antique framework of the system of revetments to pass above them and to be interrupted only by the aedicula. In design these panels are framed by geometric borders, about 18 cm. wide, composed of alternating quatrefoils and lozenges which enclose discs of red porphyry, surrounded by two bands of green porphyry, likewise raised in relief, separated by a narrow band of red porphyry. Large parts of the two green bands in the left panel and of the inner band in the right panel had been lost and have been restored in plaster. Immediately above the door are two opus sectile panels which flank a large central slab of verd antique. Each of the two lateral panels depicts four dolphins heraldically arranged in pairs above and below a central disc of red porphyry. The two panels are similar to one another in composition and design although there are distinct differences in width and in some of the details and materials.
 The backgrounds of both are composed of pieces of pinkish yellow marble irregularly shaped and carefully fitted together. The porphyry disc of the left panel is considerably larger than that of the other. Both discs are bordered, first, by a band of marble (the ancient Dokimion marble?) which today is found in quarries near Afyonkarahissar, in Phrygia. In the left panel this in turn is surrounded by a band of green "porphyry" while its counterpart is bordered by true porphyry. The verticality of the panels is emphasized by narrow bands of green "porphyry" near their sides. The paired dolphins are arranged back to back, so to speak, with their tails in the center and the rest of their bodies curved around the central disc to the sides. The tails are bound together by jewelled bands and between each pair is a vertical element: tridents in the panel to the right, and in that to the left what seems to be a pointed shaft or harpoon. At each side of the panels, between the heads of the dolphins, are two marine creatures, apparently Cephalopods of some kind, which the dolphins are about to devour.
 The bodies of the dolphins in both panels are of green "porphyry" with red porphyry used in the curving parts of the bodies near the tails, but, whereas the thin lines that delineate the bodies and tails in the left panel are made of very narrow pieces of white (dolomite?) rock, most of the equivalent lines in the dolphins of the right panel are executed in nacre (mother-of-pearl). In the latter panel nacre is also used in the outlining of the eyes, the small circular dots grouped around the eyes, the main body of the bands that bind the tails of the fish, and in the diagonal pieces in the shafts of the tridents that indicate their spiral treatment. Whereas very little red (porphyry) is used in the fins marking the gills of the four fish in the right-hand panel, the treatment of the eyes and fins of the left-hand panel is more colorful. Here, the areas surrounding the eyes are inlaid with bright green, the centers of the eyes are bright red, almost vermillion, and the fins behind the eyes are of darker red. The jewels in the bands with which the tails of the fish are bound are variously disposed stones of red and green.
The small marine creatures on which the dolphins are feeding are difficult to identify. They are made of white dolomite rock and are characterized as having heads (or are they bodies?) shaped like hens' eggs from which tentacles extend. With only one exception, the creatures in the left panel have tentacles only behind them, while their equivalents in the right panel possess tentacles both before and behind. Perhaps the representation of squids or young octopi was intended.
The two lower panels flanking the Royal door are representatives of a group of twenty related ornaments that are placed at scattered points throughout the ground floor. Two others are in corresponding locations on the narthex side of the wall. The remaining sixteen are placed, at similarly low level, on the responds of the great piers in the two side aisles where they are grouped in four sets of four. The two here illustrated consist of large ovoid shaped slabs of green "porphyry" in the center surrounded by scroll patterns in relief, also of green "porphyry," set against a background of red porphyry sunk to the same level as the central slab.
The technique of their manufacture is similar to that of the other opus sectile panels described above in the western tympanum9 of the west bay of the south side-aisle, and in the great arch that frames it. In these vast spaces of gold mosaic ground are four huge jewelled crosses, one of which occupies the center of the tympanum. Another cross was placed in the summit of the arch, oriented east and west with its top toward the east, while the others, which run north and south, are in the two haunches of the same arch. The presence of all four of these crosses had been in good part concealed by over-painting and by the application of stencilled ornaments, placed there, no doubt, by the Fossati brothers about a century ago. Thus, the cross in the summit of the arch was covered by an ornamental medallion which imitated, in general, the motifs that occur in the centers of the cross vaults of the narthex and elsewhere in the building, while the other crosses were obscured by the curiously shaped motifs found in the mosaics of the webs of the cross vaults.
The gold background of the tympanum, devoid of any silver tesserae, was laid in horizontal rows in which the tesserae were tilted at an angle, to face downward, as was usually the case in the backgrounds of the pre-iconoclastic mosaics on vertical surfaces in Hagia Sophia, and often elsewhere as well. The great cross in the lunette" is outlined by a jewelled border which varies in width from 7 to 8 cm. Within the border outline, the field of the arms of the cross is, like the back- ground of the lunette, filled by horizontal rows of tilted gold cubes. The borders are executed in blue glasses and the gems that are set into it at regular intervals are outlined in gold. Eliptical and rectangular gems alternate; the former are of dark red glasses and the latter of green. Between the gems there were originally "St. Andrew's" crosses of silver tesserae, i. e., four small squares, set some distance apart, which form a square, and another similar square in the center. Most of these are now missing from the cross in the lunette, but they were like those that still exist in the cross at the summit of the arch.
The corners of the arms are marked by tear- drop serifs which shade from blue around the edges to green within.
Unlike the ground of the lunette, the gold background in the soffit of the arch is laid with tesserae parallel to the surface of the arch. This does not indicate a different epoch, for we have yet to discover the use of tilted cubes on any but vertical surfaces of the walls - never in an arch or vault. The cross at the top of the arch is, in every respect except size, like the one in the lunette. The two largest crosses are in the haunches of the arch. They are outlined with borders of red glass in which diamond shaped ornaments of silver with small square projections at the centers of each side are spaced at regular intervals. Within each of these is a diamond shaped center of green. Alternating with the diamonds is an X shaped ornament with blue or green knobs, tipped with silver, at the ends of the strokes.
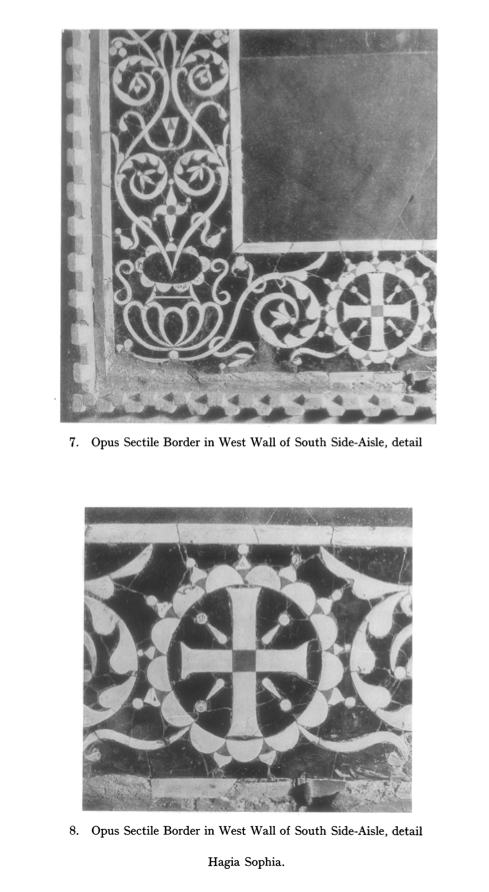
The west wall of the south side-aisle, beneath the lunette and arch whose mosaics have been described above, is covered with revetments and is penetrated by three doors that lead to the narthex. Above the two southernmost doors, which are placed equidistant from the axis of the aisle, are two panels of opus sectile, each of which consists of two slabs of porphyry surrounded and separated by very richly ornamented borders between 27 and 28.5 cm in width which are of particularly fine design and workmanship. Of the two panels, the following description and illustrations concern the southern, or left, one. The two porphyry slabs, which are framed by the ornaments here described, are of equal height but the left slab is considerably narrower than the right, thus making the panel distinctly unsymmetrical. Its northern pendant, however, reverses the dissymmetry by placing the narrower of its slabs of porphyry to the right.
The rich border is mainly composed of vine scrolls that issue from fluted amphorae. The vases are placed in the lower border at the base of each of the three vertical borders so that the scrolls rise at the sides of the porphyry slabs. Crosses within circular borders are placed on the centers above and below the porphyry slabs, while here and there, in the midst of the vine scrolls, are other smaller crosses.
The technique, materials, and motifs bear a close relationship to extensive opus sectile ornaments that occur elsewhere in the nave of Hagia Sophia, for example, in the spandrels and above the arches of the colonnade at gallery level, where the vine scrolls are very similar, and in the frieze below the upper cornice in the arch of the bema, where the amphorae recur. The technique of their manufacture is like that described above with regard to the aedicula panel. The positive elements of the design are mostly of the white, mat, dolomite rock. There are, however, numerous accents of a bright red stone, for example, in the narrow outer most border, in the central squares of the crosses, at the centers of some of the blossoms, and in the small triangular space fillers between the white cusps of the frames surrounding the larger crosses. The background is of various dark stones approaching black. In the flutes and in the openings of the necks of the amphorae the stone is a very fine grained black marble with yellowish gray mottling that is particularly beautiful. Some of the background stones are almost jet black, others, a very deep mottled red. Throughout this ornament one is struck by the beauty of line, the great accuracy of the cutting, and the highly polished level surface that was achieved.

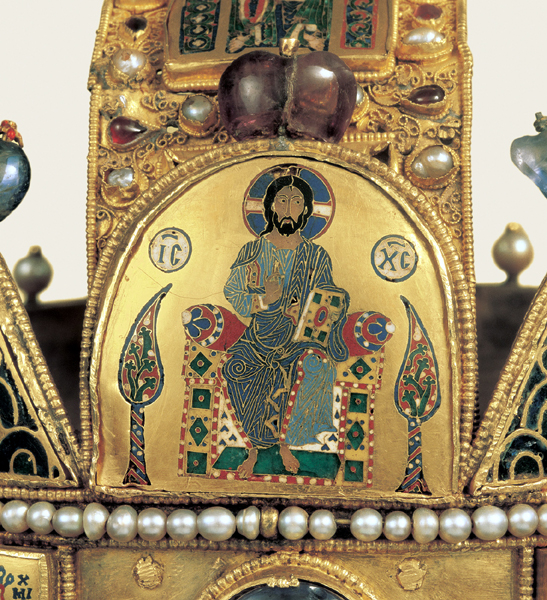
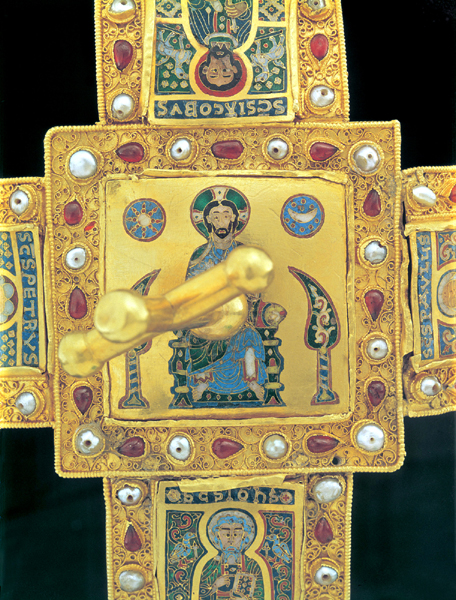
 click here for icons of christ
 click here for icons of the theotokos
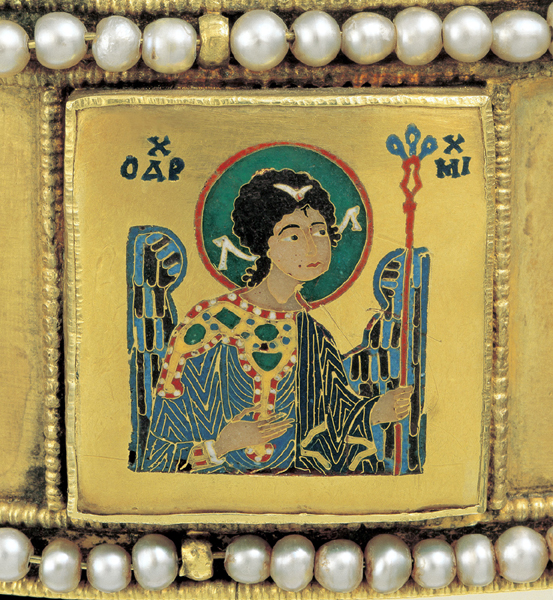
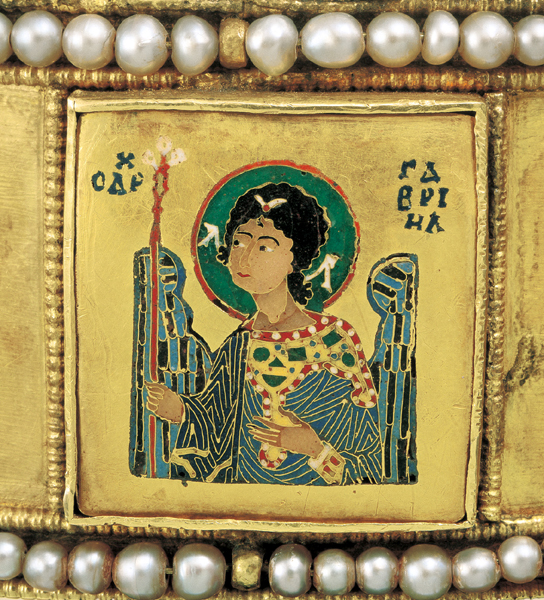
 click here for icons of angels
 click here for icons of saints