How Ikons Are Created - The Board
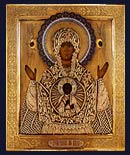
The panel on which you paint an ikon is very important. In ancient times cypress or lime where the preferred woods, but these are now hard to find. Soft resinous woods - like pine - simply will not work and should be avoided. Most hardware stores carry hardwoods, like ash and maple, which will work well if they are fine grained. I also use hardwoods like cherry, pear, walnut and holly, which can be rather expensive and hard to find. For those on a budget, particle board will work, but the results are not the best. In selecting a board watch for fine grain - pick a panel without any knots, cracks or warping. A flat board is the easiest to use, however I often carve out the traditional nitch in the center (not possible with particle boards) of the panel.This is a laborious process and should be left to wood-working professionals or advanced students of ikonography.
Pandora carries prepared ikon panels which are expertly crafted in various sizes and shapes. This boards are made in the traditional way, with slats inserted across the back to prevent warping for an extra charge. They will even send them to you pre-gessoed, which saves a great deal of time. They are very expensive.
If you want to make your own - or if you buy a pre-made panel that is not gessoed - you board must be primed by using a combination of chalk and natural glue. This is called True Gesso and it is essential to use it for egg tempera painting. The acrylic gessos sold in stores will NOT work with ikon painting. One part glue is combined with 10-12 parts water and allowed to soak overnight. This mixture is then heated in a double boiler and applied in one or two coats to the wood board. This helps the coats of gesso-primer to better adhere to the board. After this has dried thoroughly a misture of 1 part glue solution to 1 1/2 parts chalk is mixed and heated in the double boiler. Mix the ingredients very gently. The gesso should be heated until warm, but not allowed approach boiling. It should be allowed to cool a bit (some pass the mixture through cheesecloth at this point, but I don't) and they be applied on the board in six to eight rather thin coats with a large, soft, clean, flat brush. Some suggest applying the gesso in rapid cross strokes, which gently wipe out the furrows of the brush as you go. This works for me. All coats of gesso must be applied in one extended session or the coats may not adhere to each other well. It can be rather tricky to know when each coat has dried sufficiently to take the next one. I watch the surface to see when the wet shine has completely vanished. This will happen rapidly, especially with the first coats. After all the layers are allied the board should be palaced in a dry spot and allowed to completely dry out. This takes at very least 24 hours and it is best to wait another day or so to be sure the panel is ready.
At this point I take a very fine sandpaper and polish the surface of the panel as finely as possible. Use a circular motion for best results. I can usually tell when a panel is done by the appearance of the surface of the gesso which is ready when it has a very slight glassy appearance in a raking light.
Request a quote on a painting seen on this page or a new commission from Bob Atchison, click here.
Next chapter: Pigments and Brushes

